ANTUINSIGHT
Development & supply chain

Manufacturingprocesses

A single product can combine several processes. We work with suppliers to choose a route for its use, material and order size, then translate the dimensions, feel and function of the approved sample into production checks.

Explore the process diagrams
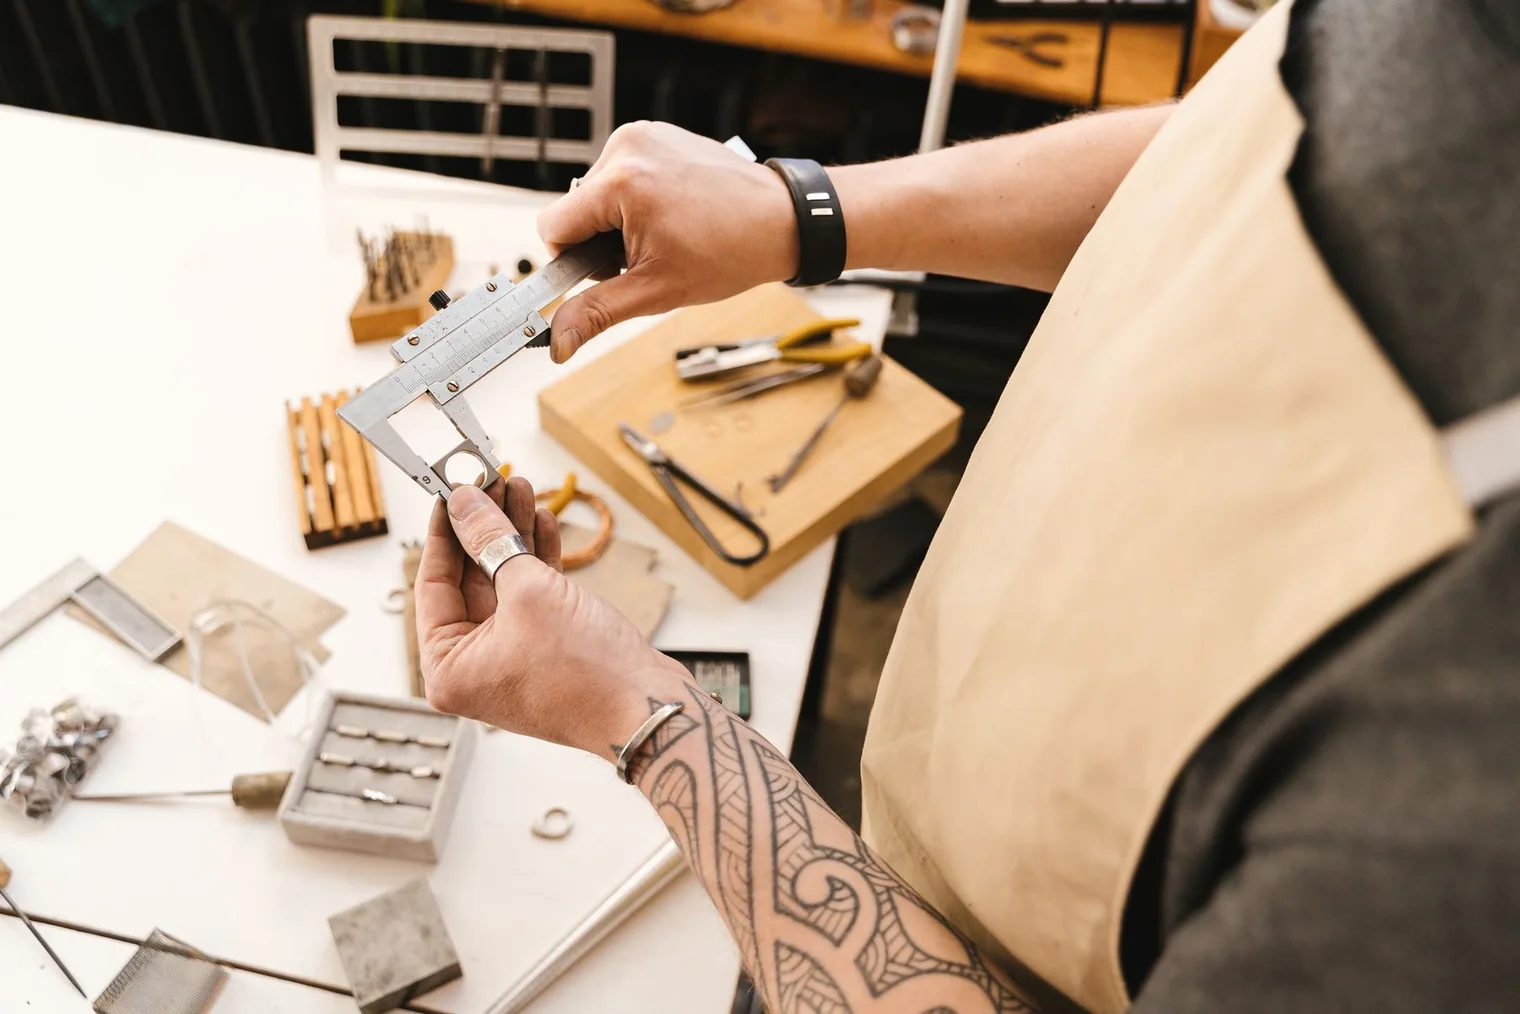
A craftsperson measures a metal ring with calipers at a workbench

Textiles

Textiles & sewing

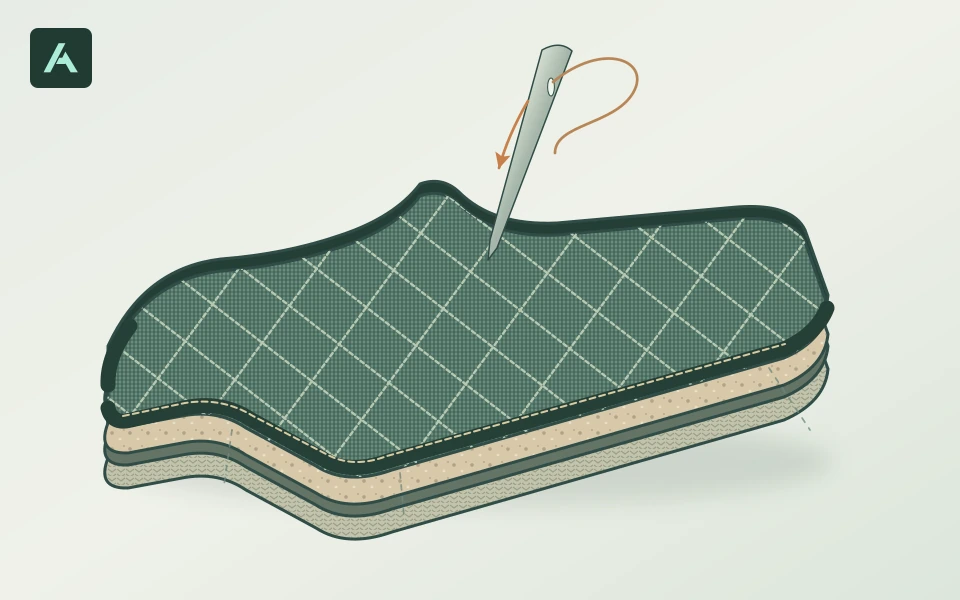
A cutaway of a saddle pad shows its outer fabric, padding, lining and stitched edge.
Binding wraps the cut edges of the pad and holds the layers together.

Layers of fabric, lining and padding are cut to a pattern and stitched together. On a saddle pad, their combination determines the shape, bulk and feel against the horse.

Sample approval
Check how a saddle pad sits against the horse, whether binding lies flat and how strap attachments respond to the agreed pull test.
Production control
Release a marked-up pattern, stitch specification and size chart. During production, compare dye lots and spot-check seam position and finished dimensions.
Molded parts

Injection molding

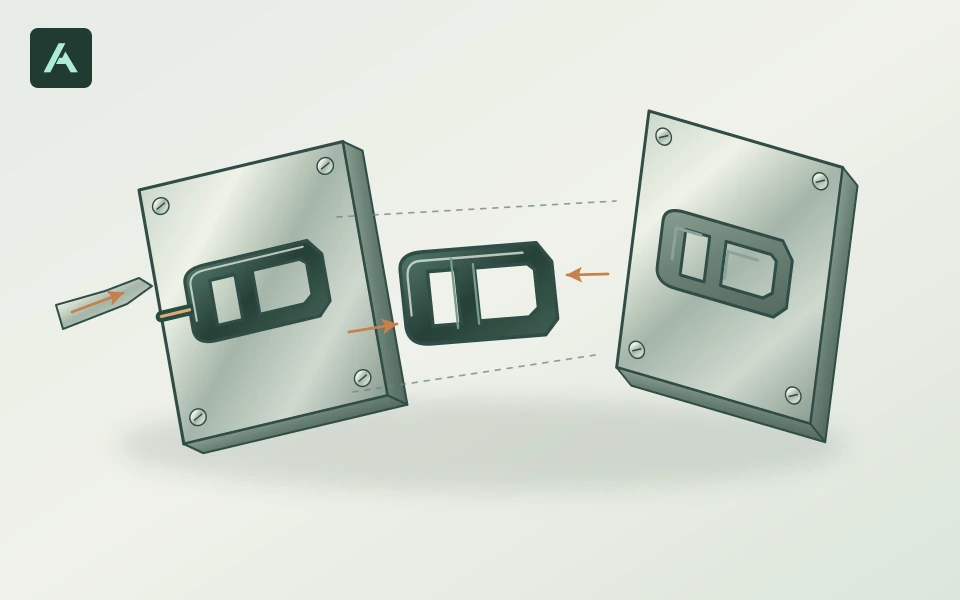
A buckle half sits between two mold halves, with the flow path into the cavity shown.
The gate position determines where the molded buckle carries a small witness mark.

For clips, buckles and molded housings, molten plastic fills a closed tool. The material and wall design affect how the part shrinks and fits after cooling.

Sample approval
Review gate marks and parting lines on visible surfaces. Try the first buckle against its matching half and the specified webbing.
Production control
Approve a resin grade, colour sample and critical dimensions. Record cavity identification where needed to trace a fit issue to its source.

Thermoforming

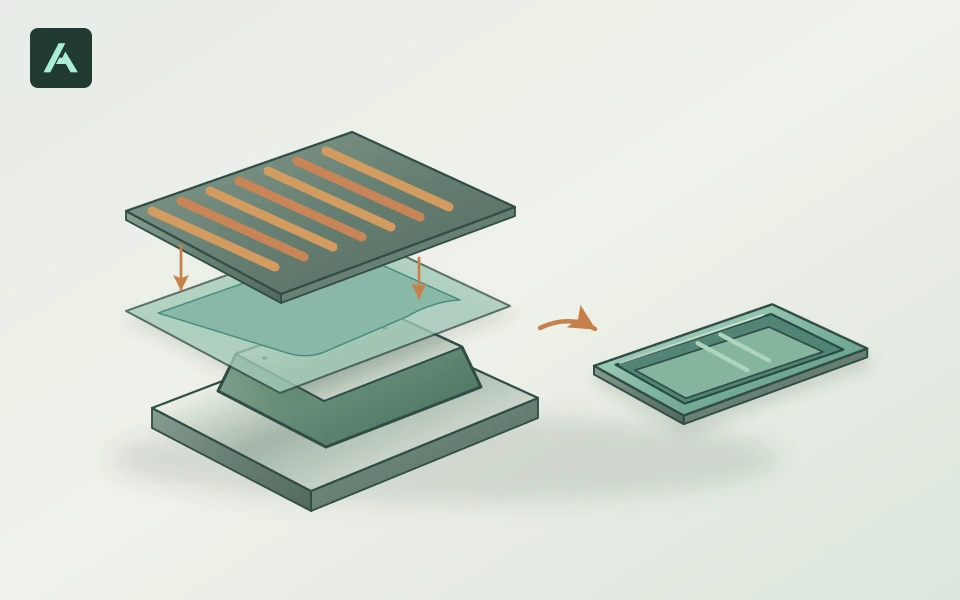
A sheet takes the shape of a tray tool beside a finished packaging insert.
Deep corners stretch the sheet and can be thinner than the starting stock.

For fitted trays, packaging inserts and shallow shells, a heated sheet is drawn over or into a tool, cooled and trimmed to its final edge.

Sample approval
Fit the actual product into a trial tray. Check the thinnest drawn corners, edge clearance and how easily the product lifts out.
Production control
Specify the sheet material, starting thickness and trim line. Compare production trays with the approved sample and check that stacks separate cleanly.

Resin & elastomer casting

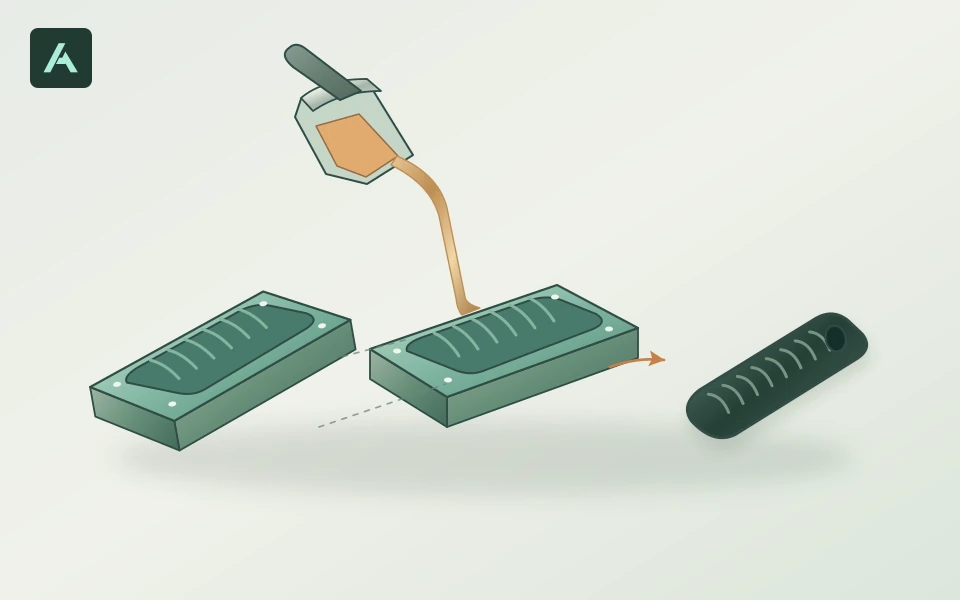
Liquid resin fills a split mold beside the finished handle grip.
The mold copies the master’s surface texture into each grip.

For a short run of grips or covers, we can reproduce a master in a silicone mold and cast liquid polyurethane. Resin choice sets the target hardness and feel.

Sample approval
Compare cured parts with the master for shrinkage, bubbles and surface detail. Fit a grip on the intended handle before approving the compound.
Production control
Keep a reference part and material batch record. Check later pours for mold wear, and agree when another mold is needed to finish the order.

Part making & finishing

3D printing

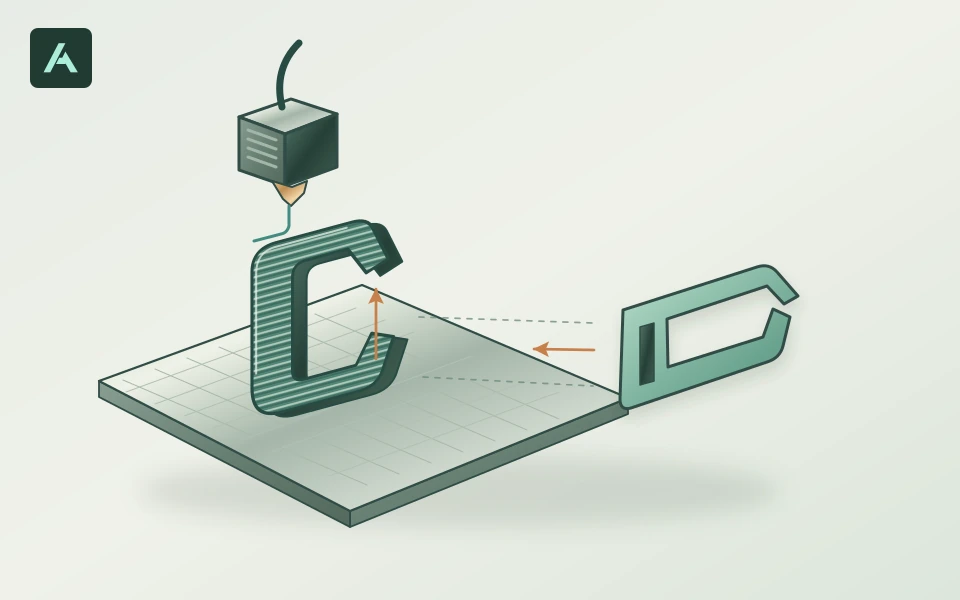
A clip prototype is built in layers and shown beside its mating part.
Trying both clip halves together reveals where the latch binds or leaves excess play.

3D printing builds a part in layers from a digital model. A new clip, enclosure or assembly jig can be printed and tried in the hand before a production tool is ordered.

Sample approval
Choose the print material and orientation for the question at hand. Try mating parts, button reach or cable clearance, then revise the model.
Production control
Release the approved model revision. For printed batches, record the material, orientation and finish. For molded production, verify function again on the molded first article.

Mechanical & CNC engraving

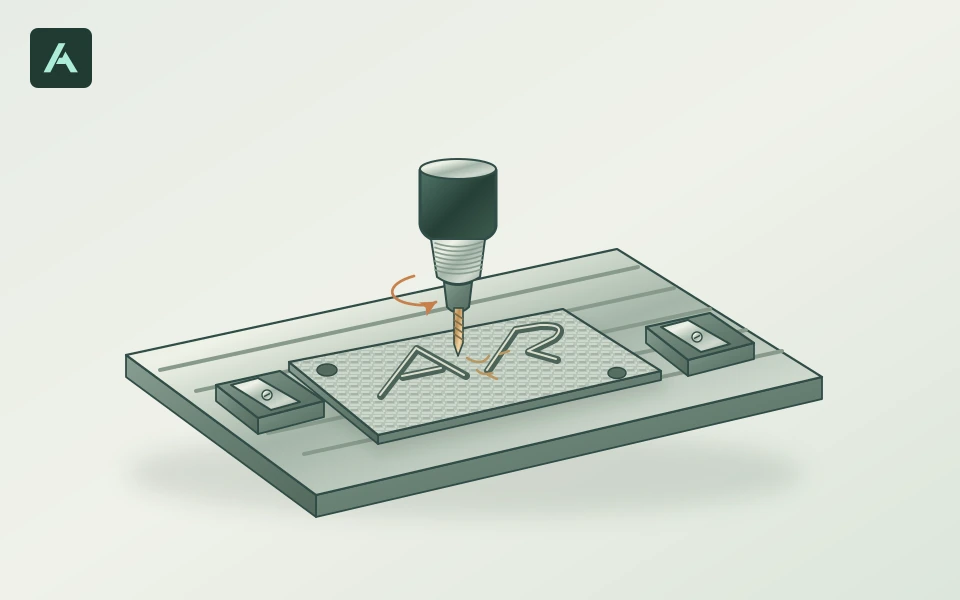
A rotating cutter engraves recessed lettering into the face of a metal badge.
The cutter profile and cutting depth shape each engraved stroke.

A rotating cutter removes material to create recessed lettering, graduations or relief on a rigid part, such as a metal badge or a wooden handle.

Sample approval
Cut a sample on the intended material and finish. Check that small lettering stays legible and the cut edge is comfortable to touch.
Production control
Approve the artwork scale, engraving depth and position relative to a fixed reference. Check first pieces after a tool change against that sample.

Investment casting

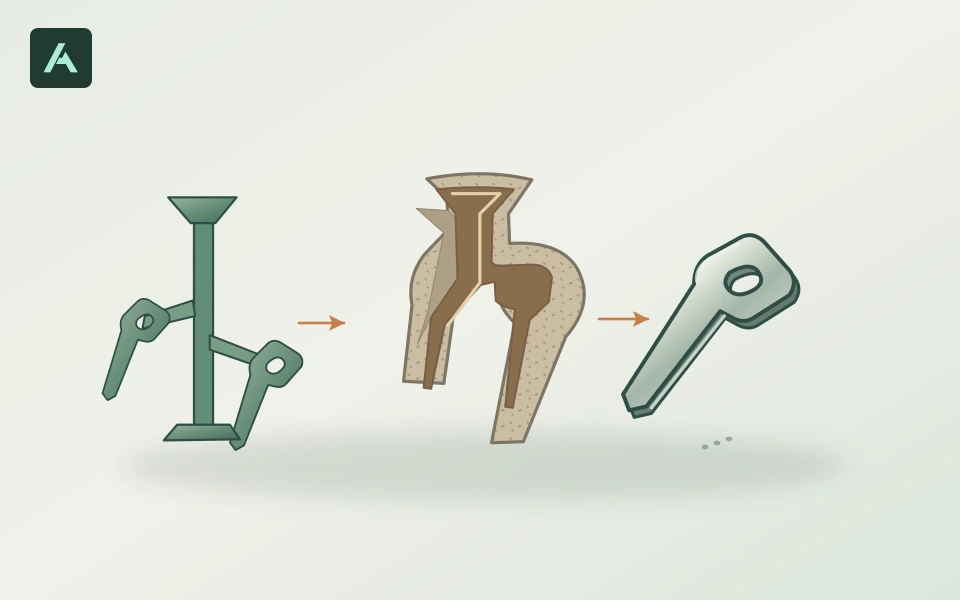
A wax pattern, ceramic shell and finished metal fitting with a pin hole.
Removing the wax leaves a cavity for the alloy. The pin fit is checked on the finished part.

A wax pattern defines a metal fitting. A ceramic shell is built around it, the wax is removed and molten alloy fills the shell.

Sample approval
Confirm the alloy and review the first casting for surface flaws. Check the mating holes, pin fit and any faces that need machining.
Production control
Tie inspection records to alloy heats or production lots. The approved drawing identifies critical dimensions, machined surfaces and the checks agreed for the fitting.

Surface finishing

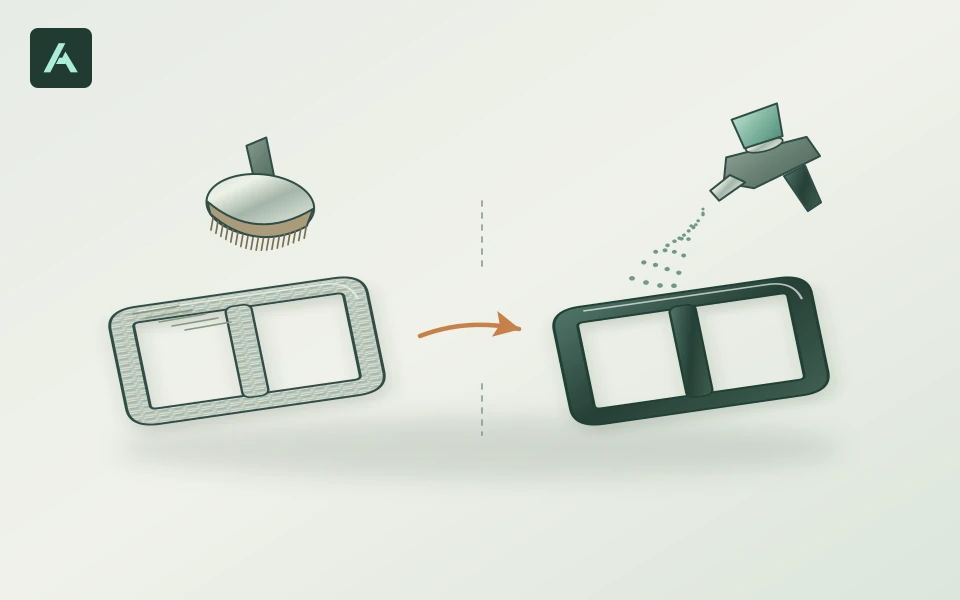
Two buckle finishes illustrate a brushed metal grain and a coated surface.
A finish sample on the chosen metal sets the reference for colour or grain.

Brushing gives a metal buckle a directional grain, while a coating can add colour and a wear surface. Select the finish for the base material and the intended use.

Sample approval
Approve the colour, gloss or grain direction on the actual substrate. Agree where coating should stop so threads and fitting surfaces still work.
Production control
Keep the approved finish sample for batch comparison. Agree on coating adhesion or wear checks appropriate to the intended use.

Electronics & integration

Electronic circuit design

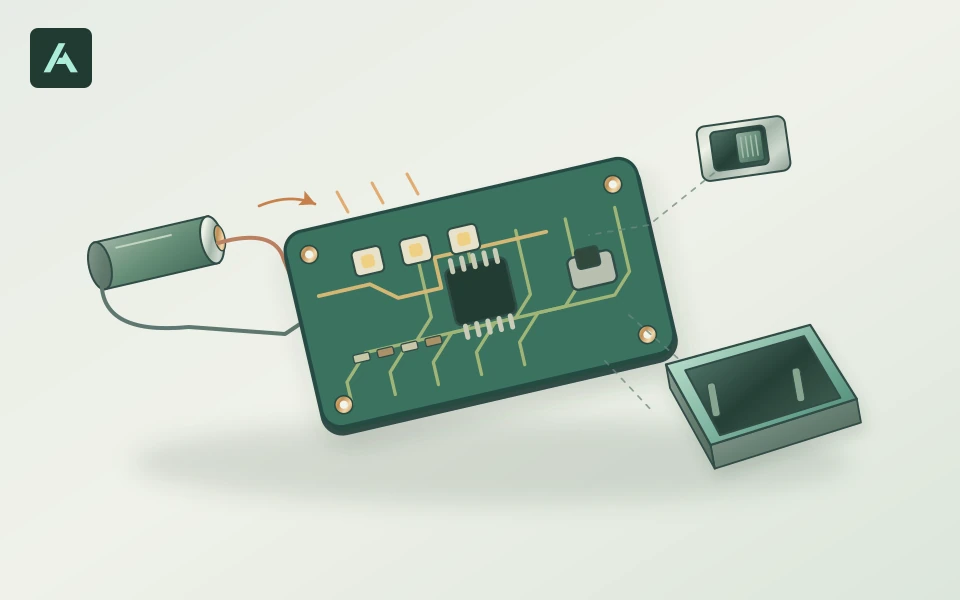
An LED board with its switch and power source shown in relation to the lamp housing.
The board and the housing share mounting points and a switch position.

Circuit design connects the power source, controls and outputs, then arranges those components on a board. For a small light, that means choosing how the switch and power supply drive the LEDs.

Sample approval
Review the schematic and component list, then power up a prototype. Measure current in each operating mode and check switches, connectors and enclosure fit.
Production control
Freeze the board files, bill of materials and any firmware revision. Agree on a functional test for each assembled unit and review component substitutions before use.

Assembly

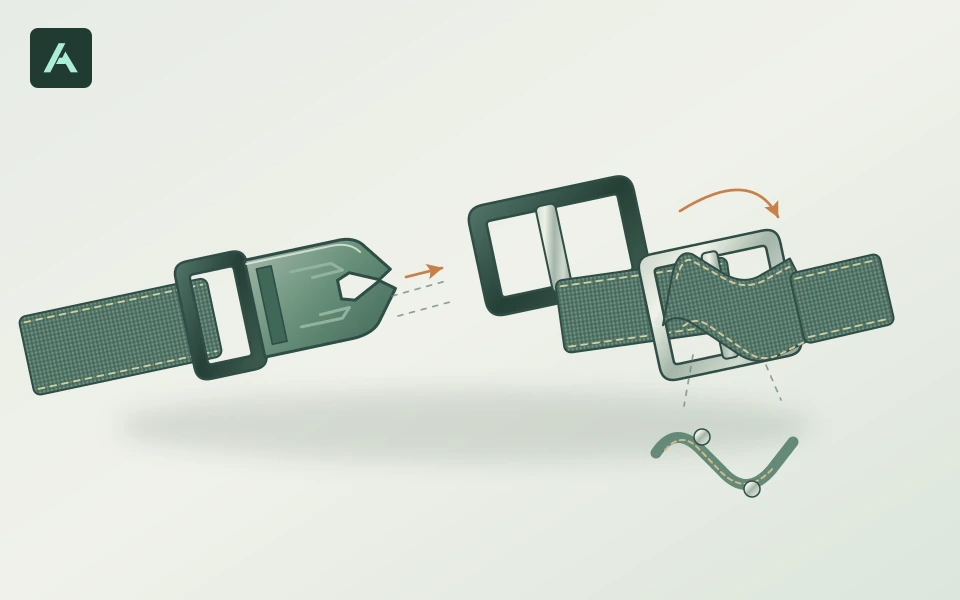
Webbing passes through a buckle and an adjuster on a pet harness.
Webbing must pass through the adjuster in the specified direction to hold its setting.

Assembly joins finished parts into a working unit. A walking harness, for example, needs its webbing routed through the correct buckle and its adjuster facing the right way.

Sample approval
Build a complete unit from production-intent parts. Check movement, clearances and fastening, then confirm which defects require rework.
Production control
Issue an illustrated assembly sequence and inspection points. Check function, supplied accessories and pack-out against the approved unit.

Multi-process integration

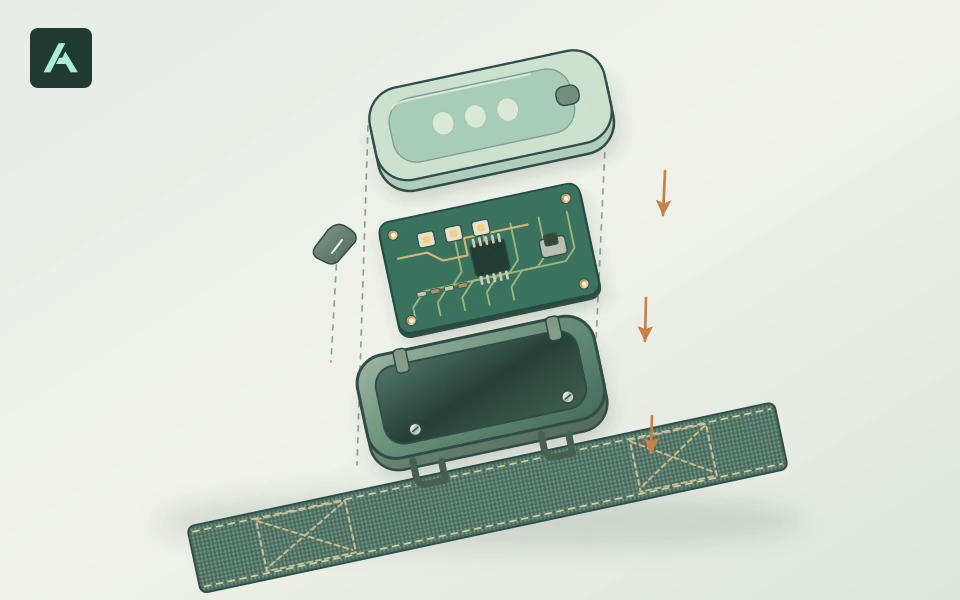
An exploded clip-on light shows its sewn strap, molded housing and circuit board.
A change to the housing can move the switch opening or alter the strap fit.

A rechargeable clip-on light can combine a molded housing, a sewn strap and a circuit board. The board must fit, the button must line up and the strap has to work with the clip.

Sample approval
Bring sample parts from each supplier into one trial build. Check the interfaces and repeat the affected fit or function checks after a change.
Production control
Coordinate part revisions, order quantities and delivery dates against the assembly schedule. Use one approved unit, component list and packing specification across suppliers.

Technical references

Discuss your product

Have a sample, sketch or parts list? Share how the product will be used, the expected quantity and any material requirements so we can review the process and prototype together.

Partnerships